Updates

What's new.

The latest brushes, tools and touches - in plain language, for the people who draw with Nekudot. For the technical log, see the changelog.

v0.53.0

Install it - and fill the screen

You can now add Nekudot to your home screen and run it full screen, so it feels less like a website and more like an app you own - a bigger, calmer canvas with none of the browser's bars in the way. On an iPad or iPhone, tap Share, then Add to Home Screen: Nekudot gets its own icon and opens on its own, straight onto the canvas. And on an iPad or a desktop browser, a new Full screen button in the toolbar - next to Reset view - hides the browser's chrome so your art fills the whole display; tap it again, or press Esc, to come back. It's the same local app either way, and nothing is uploaded.

  • Add Nekudot to your home screen for an app-like, chrome-free canvas - lovely on iPad
  • A new Full screen button fills the display, wherever the browser supports it
  • Its own icon, name and standalone window once installed
  • Still entirely on your device - your work never leaves it
v0.52.4

Menus that stay on screen

On a narrow phone, the toolbar's dropdowns - the brush picker and the symmetry menu - could open half off the right edge, clipping the names. Now they gently slide back so the whole menu sits on screen, whatever size your display is. Nothing to change; it just fits.

  • The brush and symmetry dropdowns no longer run off the edge on small screens
  • Menus nudge themselves fully into view at any screen size

v0.52.0

Timelapse video - an early experiment

An early, experimental way to export your whole drawing session as a video - a timelapse of the artwork building up, as MP4 or WebM. Switch on session recording in Application settings before you start drawing; when you're done, the Record row becomes Create process Video and replays everything you drew into a video file. It is still a work in progress and not finished - the results, and the option itself, may change or be removed in a later version - so treat it as a preview, not a settled feature. (With recording off, Record still makes a short GIF, just like before.) As always, it happens in your browser; nothing is uploaded.

  • Experimental: an early preview that may change or be removed in a later version
  • Export a whole-session timelapse as a video (MP4 or WebM) when recording was on
  • Turn on recording in Application settings before you draw, then export when you finish
  • Runs entirely in your browser - nothing is uploaded

v0.39.0

Layers move to the toolbar

Your Layers panel now opens right from the toolbar, next to Memory Maps. Tap the stacked-layers icon and it drops open just below - no window to hunt for or drag around, which is a real relief on a tablet. Everything's still there: reorder by dragging the grip, rename a layer, set its opacity, duplicate or delete it, and choose the background. Tap the icon again, tap away, or press Escape to put it away. It's the next step in moving Nekudot's floating panels into the toolbar, so your tools stay a tap away wherever you draw.

  • Open Layers from a stacked-layers icon in the toolbar, next to Memory Maps
  • Drag to reorder, rename, opacity, duplicate, delete, background - all unchanged
  • Tap to open, tap away to dismiss: friendlier on tablets and touch

v0.38.0

Memory Maps, a tap away

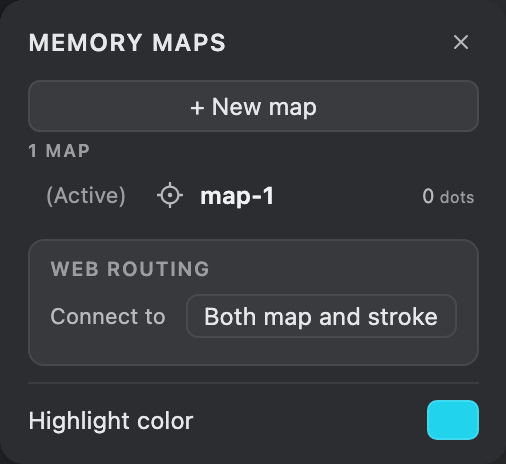
Memory Maps now live right in the toolbar. Tap the cloud-of-dots icon and the panel opens just beneath it - no floating window to drag around, which feels especially good on a tablet. Tap the icon again, tap away, or press Escape to close it. At the top there's a new Live view switch: flip it on to keep the active map's dots glowing on the canvas while you draw, so you can see exactly what a connecting brush will reach for - and the toolbar icon lights up so you always know it's on. It's part of a bigger tidy-up: we're moving the floating panels into the toolbar so everything sits a tap away, wherever you're drawing.

  • Open Memory Maps from a cloud-of-dots icon in the toolbar - no window to drag
  • A new Live view switch keeps the active map's dots on the canvas as you draw
  • The toolbar icon lights up while Live view is on
  • Friendlier on tablets and touch: tap to open, tap away to dismiss

v0.36.0

A living line, even without a stylus

The Color Pen now varies its width by how fast you draw - a quick flick draws thin, a slow drag swells thick - so a mouse or finger gets the graceful, hand-driven weight a stylus gets from pressure. Its colour already walks the palette as you turn; now its weight follows your speed too, so direction and pace shape one expressive stroke. It's on by default; toggle it and tune the strength in Brush settings. A real stylus is unchanged - pressure still leads there.

  • The Color Pen line thins as you move fast and swells as you slow down
  • Grace for a mouse or finger - no pressure pen needed
  • Direction moves the colour, speed moves the weight: one living stroke
  • Toggle and tune it in Brush settings (Speed taper + Taper amount)

v0.35.0

Rest your palm - only the pen draws

Drawing on a tablet with a stylus? Turn on Pen only draws and rest your hand freely - only the pen marks the canvas, so a resting palm or a stray finger leaves nothing behind. Two-finger pan, pinch and rotate keep working as always. It is off by default, so finger drawing still works; find it in App settings under Input on any touchscreen.

  • New Pen only draws toggle: only a stylus paints, so a resting palm leaves no stray marks
  • Two-finger pan, pinch and rotate still work
  • Off by default; in App settings under Input, shown on touch devices

v0.34.0

See your brush before you paint

Now you can see exactly how big your brush is before you lay down a stroke. A ring follows your cursor at the brush's real painted size, scaling as you zoom so it always matches what will land. For connecting brushes there's a second, dashed ring that shows how far the web will reach out. Prefer the classic crosshair? Choose your cursor in App settings.

  • A ring under your cursor shows the brush's real size, matched to your zoom
  • A dashed ring shows how far a connecting web will reach
  • Pick your style in App settings: size ring, reach ring, crosshair, or a mix

v0.33.0

An eraser that actually forgets

Erasing used to rub out only the ink - the invisible dots that pull your web stayed behind, so a new stroke would weave right back into the space you thought you'd cleared. Now the eraser forgets those dots too. A new Erase mode lets you choose what a wipe removes: the paint and the dots together (the default), just the paint, or just the dots. And if you go too far, one undo brings back both.

  • Erasing now forgets the dots under it, so the web stops reaching into cleared areas
  • A three-way Erase mode: Paint + dots (default), Paint only, or Dots only
  • Dots only is a forget brush - thin out the memory without touching your art
  • Undo brings back the paint and the dots together

v0.32.0

Find your way around the canvas

It's easier to see - and to remember - how to move around your canvas. Zoom in or out and a small percentage pill flashes in the corner, so you always know where you are; click it to snap straight back to 100%. And the Shortcuts panel now has a View group that gathers every way to pan, zoom, rotate and reset the camera in one place.

  • A zoom % pill flashes in the corner as you zoom - click it to jump back to 100%
  • A new View group in Shortcuts collects every way to move the camera
  • Pan, zoom, rotate and reset, all in one place to discover

v0.31.1

Clearer names for the same magic

A few tools and words got clearer names, so the app reads the way it works. The main brush - a round line plus its connecting web - is now simply called Web. The marks your drawing remembers are called dots everywhere. And the old Invisible brush is now Seed: it sows dots for the web to grow on, without leaving any ink on the layer.

  • The main brush is now called Web - a round line plus its connecting web
  • Your drawing's remembered marks are dots everywhere now, not "points"
  • The Invisible brush is now Seed - it sows dots for the web and leaves the layer blank
  • A friendlier undo message, so you always know exactly what came back

v0.31.0

Glow - draw with light

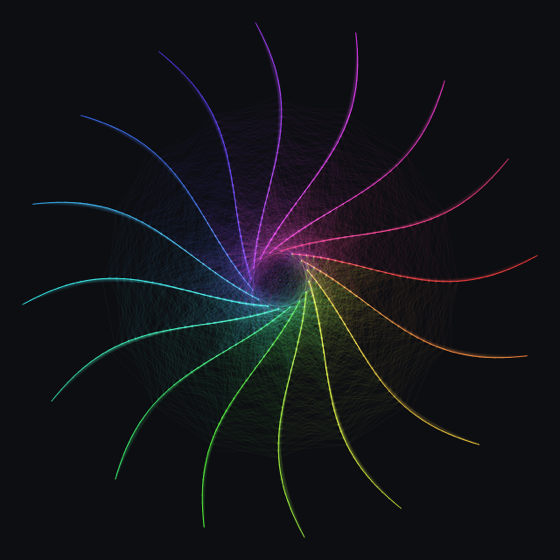
Meet Glow, a new web style whose strands add light instead of stacking like paint. Where your web overlaps it brightens, and where different colours cross they mix toward a glowing white - so a dense stroke or a mandala turns into a soft, luminous halo on the dark canvas. Pick Glow under the Web styles and try it with a rainbow or gradient colour for the full effect. And there is a new "Add" mode on the Blend dial for when you want the glow even hotter.

  • Glow: a new web style whose strands add light instead of stacking
  • Overlaps brighten, and crossing colours mix toward white - a luminous halo
  • Loveliest with a rainbow or gradient colour on the dark canvas
  • A new "Add" blend mode pushes the glow even punchier
Glow - draw with light

v0.30.0

A gentle nudge to your first stroke

First time on the canvas? A quiet "Drag to draw" cue now shows you the whole trick - just drag - and it fades away the moment you make your first stroke. Once that stroke blooms, a small tips strip slips in with a few ways to go further, then bows out on its own. Everything is written for touch, so there is nothing to memorise and no keyboard needed.

  • A soft "Drag to draw" cue greets a first-run canvas, gone on your first stroke
  • A quiet tips strip appears just after your first stroke, then retires itself
  • Tips rewritten for touch - tap the Web, Symmetry and brush pills, no shortcuts required

v0.29.0

Fur that flows along your stroke

Draw a curve with the Fur web and the hairs now sweep along the line you drew, instead of all combing one fixed way. Loop it, curl it, wind it around - the grain follows your contour like a real pelt, so fur finally reads as fur and not combed wallpaper. A new "Follow stroke" dial in the Fur settings sets how strongly it leans into your direction.

  • Fur hairs now sweep along the direction of your stroke
  • Curved strokes grow flowing, contour-following pelts
  • A new "Follow stroke" dial sets how much the grain follows

v0.28.0

Save or share your art in one tap

Keeping what you made is now right there on the toolbar - no more digging through a menu. Tap Share to hand your drawing straight to your phone's share sheet (Instagram, Messages, save to Photos), or on desktop it saves a PNG and copies a caption ready to post. The more detailed options - a transparent PNG, the .nekudot file, a GIF - are still tucked in the "..." menu.

  • A Share button now sits right on the toolbar, always one tap away
  • On mobile it opens your share sheet; on desktop it saves a PNG and copies a caption
  • All the detailed export options are still in the "..." menu

v0.27.0

The Memory Maps panel explains itself

The Memory Maps panel now opens with a plain-language note pinned at the top, so it is always clear what it is for. Every point your brush drops is remembered there, and the connecting webs weave lines between nearby points - now the panel says so, right where you need it, with no help mode to switch on.

  • A short explainer stays pinned at the top of the Memory Maps panel
  • Always visible - no help toggle to find
  • Makes it clear your points are remembered, and webs connect the nearby ones

v0.26.0

Chrome - a shimmering metallic web

There's a new web style to try: Chrome. As you draw, it threads your points with lines in random, darkened tones of your colour, so the web shimmers like brushed metal instead of sitting in one flat shade - a faithful nod to the chrome brush from mrdoob's Harmony. A new Blend dial sets how the lines catch the light: Lighten for a bright metallic sheen on the dark canvas, Screen for more of a glow, or Darken and Multiply for the classic look on a light background. Open the Web settings (press c), pick Chrome under Classic, and try a gradient or rainbow colour to tint the shimmer.

  • Chrome: a new metallic web style, ported from Harmony's chrome brush
  • Every line takes a random darker tone of your colour, for a shimmering, mottled sheen
  • A Blend dial - Lighten, Screen, Normal, Darken, Multiply - controls how it catches the light

v0.25.1

A cleaner first mandala

Your very first drawing opens on the mandala canvas, and now it stays readable while you play. A few eager strokes used to flood the centre into a solid white disc; the web is calmer now, so your kaleidoscope keeps its shape. Your own line shows faintly as you draw, too, so you can always see the mark you're making before the web blooms around it.

  • The opening mandala no longer washes out when you scribble
  • Your drawn stroke stays visible under the web
  • A calmer, easier-to-steer web wherever you use the Bloomer style

v0.25.0

See your point cloud at a glance

The Maps button in the toolbar is simpler now. Tap the highlight to light up your live point cloud on the canvas - a quick note tells you how many points you've laid down so far. Open the little chevron any time for that count, plus a shortcut straight into your Memory map settings.

  • Tap the highlight to show your cloud points live on the canvas
  • A chip tells you how many points you have right now
  • The chevron opens the point count and a shortcut to Memory map settings

v0.24.0

One Shapes brush

Squares and Circles are now a single Shapes brush. Pick it once, then switch between squares and circles with a two-button toggle right at the top of its settings - the same speed-sized stamps, fill and dash options as before, with one less item crowding the toolbar.

  • Squares and Circles combined into one Shapes brush
  • A quick Circles / Squares toggle at the top of its settings
  • The same speed-sized stamps, fill colour and dash styles you already had

v0.23.0

One place for the web

The toolbar's two combos - one for the brush, one for the connecting web - are now a single control. Pick Web and every connecting look lives right under it: Sketchy, Web, Bloomer, Fur, Lace and your own saved presets, as a tidy nested list. Choosing a style picks the brush and applies the look in one tap, and the style picker now sits inside the Web settings alongside its dials.

  • The connecting brush is simply "Web", with every style nested under it
  • Pick a style and it selects the brush and applies the look at once
  • The style picker moved into the Web settings, so styles and their dials sit together
  • One clear control in the toolbar instead of two

v0.22.0

Dial in your Bloom

Bloom pads a stroke with extra scattered points, so even a quick mark fills out into a full web. Now you can set how far that scatter reaches - keep it tight around your line for a soft halo, or open it up to flood a wider area with texture.

  • New Bloom radius dial: choose how far Bloom scatters its dots from your stroke
  • Tight for a soft halo along the line, wide to fill a broader area
  • Appears under Bloom once Bloom is turned on

v0.14.0

One stroke, a whole mandala

Start a Mandala and your very first stroke unfurls into a full, radiating bloom. The new Bloom connecting style fills the canvas with a lush, symmetrical web from a single gesture - no setup, no learning curve. Just drag once and watch it flower.

  • New Bloom connecting style: one stroke fans out into a dense, kaleidoscopic web
  • The Mandala start uses it by default, so the magic lands on your first try
  • Pair it with the rainbow colour source for a stained-glass shimmer

v0.13.5

Better on tablets, friendlier for everyone

A big pass on touch and accessibility. Panels and small controls are now comfortable on tablets and touchscreens, and the whole toolbar - menus, style combos and colour swatches - works by keyboard and with screen readers. Clearer focus, contrast and labels make the app easier to read and steer for everyone.

  • Panels and small controls are sized and spaced for touch and tablet
  • Toolbar menus, combos and swatches are fully keyboard- and screen-reader friendly
  • Dialogs trap focus and close with Escape; floating panels stay on-screen
  • Sharper focus outlines, stronger contrast and clearer control names throughout

v0.13.0

Save straight to a folder

Connect a folder once and Nekudot saves your artwork and settings right into it - no download dialogs, no clutter. Your work lives as real files on your own machine, ready to back up or open however you like. (Available in Chrome, which supports folder access.)

  • Connect a local folder and save your artwork and settings there in one click
  • Files land in your folder directly, with no save dialog each time
  • If the browser ever forgets the folder, reconnect it in a single click
  • Everything stays on your device - nothing is uploaded anywhere

v0.12.0

Carry your setup to any device

Set Nekudot up just the way you like, then take it with you. Export a single settings file with your app preferences, brush presets and colour palettes, and import it on another device - or after a reset - to pick up right where you left off.

  • Export everything - settings, custom presets and palettes - to one .nekudotapp file
  • Import it on another device or browser to clone your setup in moments
  • A tidy way to back up your preferences before a fresh start

v0.11.1

Smoother colour and previews

A few touches to make picking colours and learning brushes feel better. The colour picker updates your colour as you choose - no separate Apply step - and gradient connections now wrap seamlessly, with no hard seam where the colours loop. The brush Preview is one open playground, so you can just draw and explore.

  • The colour picker applies live as you adjust; "Apply" is now a simple "Done"
  • Gradient connection colours loop seamlessly, with no visible seam at the wrap
  • Brush Preview is a single playground - draw freely to get a feel for any brush
  • The Maps dot count refreshes correctly after you open a saved piece

v0.10.6

Small fixes, smoother drawing

A round of quiet fixes so the app stays out of your way. Export and Share now speak up - you'll know it saved, or what went wrong, instead of nothing happening. The Start page scrolls, so every option is in reach on a shorter screen. And "Reset to default" now fully clears before it reloads, so a fresh start really is fresh.

  • Export and Share tell you the result instead of failing in silence
  • The Start page scrolls - reach every option on small screens
  • "Reset to default" reliably wipes everything before reloading
  • Plus steadier panning and a handful of under-the-hood reliability fixes

v0.10.0

Layers that glide into place

Reordering layers used to feel jumpy - rows snapped around as you dragged. Now it's smooth: pick a layer up by its grip and it lifts and follows your finger, while the others gently glide aside to make room. Drop it exactly where you want.

  • Grab a layer by its grip handle - it lifts and tracks your pointer
  • The other layers slide out of the way, so you can see just where it will land
  • Works the same with a mouse, a trackpad, or touch

v0.9.0

Try a setting before you draw

Not sure what a slider does? Now you can watch it. Open the new Preview window from your brush settings, nudge any dial, and a demo stroke replays with your exact brush - so you see how the web weaves before you ever touch your own canvas.

  • Open Preview from the settings panel (the eye next to Reset); every change replays a live demo at your real size, opacity, colour and style
  • Flip between scenes - Wave, Circles, Spiral and Scribble - to see the effect on different shapes
  • Switch to the Playground tab to draw freely and get a feel for the brush, then Clear and try again
  • Set a Canvas, Light or Dark background to check contrast, and dial the playback speed to taste
  • A "?" explains the setting you just changed, with a few tips to nudge you along

v0.8.1

The people behind the dots

Nekudot is shaped by more than code. This release adds a Special thanks to the License & credits page - naming two people whose ideas, encouragement, and honest feedback made the app better for everyone who draws with it.

  • Silky - a friend and an amazing artist, for the inspiration, the ideas, the help, and for testing the app on an ancient version of Safari
  • Alonbase - a friend and a wonderful mentor, for the ideas, the guidance, and the tireless effort

v0.6.0

Keep your memory map in sight

Drawing toward a remembered shape used to mean flashing your map every few seconds just to check where its points were. Now you can keep it lit. One tap on the maps button pins the active map's dots so they glow softly on the canvas while you work - you always see what your strokes are reaching for, without breaking your flow.

  • Pin the active map's points so they stay visible as you draw - tap again to hide them
  • It still flashes the moment you turn it on, so you spot the points right away
  • Choose any highlight colour from the Maps panel - it tints both the pinned dots and the flash
Keep your memory map in sight

v0.5.0

Bolder colours, palettes you can carry

Gradients now blend the way your eye expects - smooth and vivid, with no muddy grey in the middle - and your whole colour library finally travels with you. Build palettes, group them by category, and carry the lot between devices as a single file.

  • Smooth OKLCH gradients stay rich from end to end (toggle it in Settings)
  • One tidy Import / Export window for palettes, grouped by category
  • Back up and restore your entire palette collection as a single file

v0.4.0

Reach further across the page

Connecting brushes can now throw their threads much further. The Reach dial goes all the way to 1000 px - five times its old limit - so big, sweeping webs that span the whole canvas are suddenly easy to draw.

  • Raise Reach up to 1000 px for canvas-spanning webs
  • Made for large canvases and loose, airy compositions

Enough reading. Make art.

Every update is one click away from your next drawing.

Open the canvas →